February 17, 2019
Finished the layers of polyurethane coating for the bottom of the house.

Finished the layers of polyurethane coating for the bottom of the house.
But first, some shenanigans at the hard ware store, because we’re starting to think about what’s next after the roof is finished.
Nate at the hardware store: “Hmmm. Is that a reasonable price for treated lumber? Will this meet our needs?” Megan at the hardware store:
 Nate at the hardware store: “We’ll need stainless or coated screws for the cedar siding… they’ll need to be longer than the insulation and the furring strips… hmmmmm…”
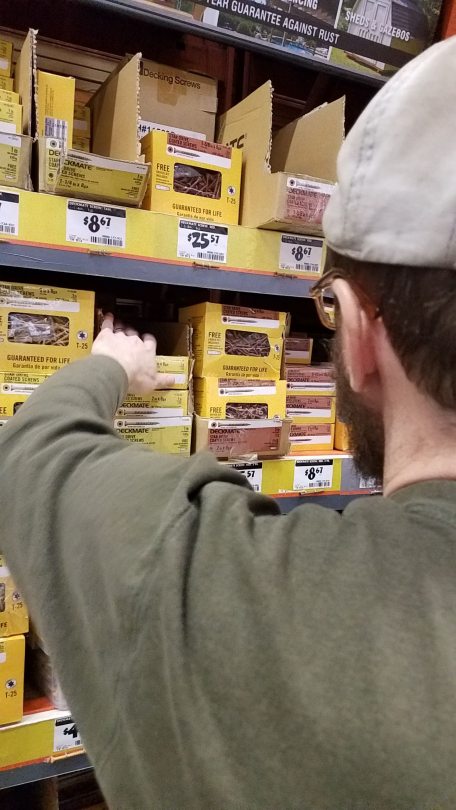 Megan at the hardware store: “Just looking for a good screw. Heh heh heh”
BACK ON THE ROOF. ACK. GAH! BLECCCCH! UGH! It felt to me like we were struggling for each inch. At least we can stand up on the dormer part of the roof. That made all these little clips vastly easier. The clips are the little white things by my knee to the left in the above picture. The ridge cap (at the right) clip on top of them.
Nate was working on the transition, which turned out to be much nastier than we thought.


It’s nasty because there’s supposed to be 3 inches of overlap whenever you have two roof pieces come together, but it’s looking like it’s impossible to fold the top piece so there are no gaps. There’s nothing under these pieces, no flashing, no ice and water membrane – the ridge is just open to the wooden ridge beam below, so gaps are a big problem. The metal roofing guys sold us this wacky complicated ridge cap because we have two different ridge pitches, but in all my hours of internet searching, I can’t figure out how that’s suppose to help.
We have two very long pieces of ridge cap at the front and back of the house, and then this transition piece between them going from the steep to the shallow roof pitch. Unfortunately, we can’t install the other long piece until the transition is done, because you have to consider the direction of wind and rain flowing when you’re towing the house, so we always have to work from license plate to hitch. WE ARE S0O0O CLOSE TO JUST HAVING A ROOF. It is like a little 3 foot wacky piece holding us up! UGH so frustrating!!
With the rake trim FINALLY on, we were ready to start the last part of the roof installation: the ridge cap. OMG. This was actually the end of the roofing! I can’t even write how ready I was to just have a roof already!
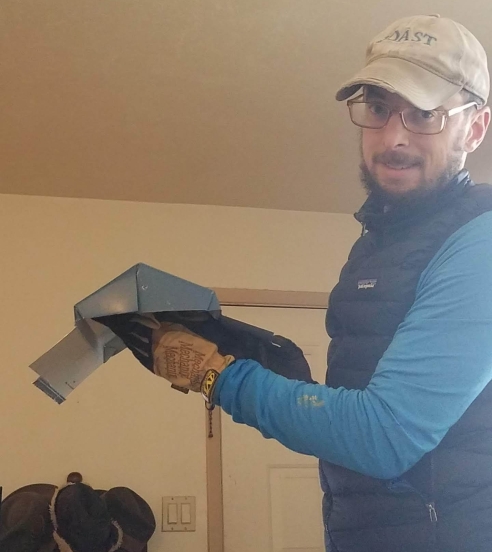


Above: test piece and actual piece.
 You can’t really see it from this picture, but there’s an awkward inch or two height difference between the gable/steep part of the roof and the dormer/shallow part of the roof. Nate has exploded the ridge cap join to try to figure out how to make that transition over the height difference.
 We also had bought a bunch of ridge cap vent material clips, but when we got ready to put them in, we discovered they weren’t right for our roof, which is why Nate was making one MILLION little clips. Good thing those guys at the metal store sold us WAAAAAY too much z-trim that we could use for this purpose.

We also discovered the vent material (spongy stuff that passes air through and repels water) wasn’t right. Guys, buying the right crap to build a roof is the hardest part of this tiny house project so far! UGH.

There was some more sticky stuff involved in getting the ridge vent attached. Every time you attach a metal piece to a metal piece, you put a layer of tacky tape to seal the boundary.


Above, Nate was scooting across the house, squeezing his thighs to keep from slipping off. He was really sore on the 2nd day of using this version of a thigh master all day. Poor Nate!

Thankfully, we had some visitors to cheer us up! Nate’s brother and family were visiting. We were so excited to share our progress with them! The girls were pretty impressed.
While Sarah and our nieces went to visit great-Grandma, we put Bryan to work.


 Bryan said I was looking like a real roofer. I’ll take that as a compliment!
 Above is a view of the transition. The bottom ridge cap piece wasn’t installed yet, just sitting in place.

 The best part was actually having half the roof complete! Once those rivets went on, that part of the roof was officially done – water-tight and ready to keep us dry! Holy cow, such a relief!
And we got a nice sunset to finish out the day!

Dealing with the overlapping layers of rake trim on the butterfly end of the roof was a bit of a pain. The lower layer needed to go behind the upper layer, but the fascia the trim attaches to wasn’t quite aligned that way. Plus, we needed to max out our extendy ladder to reach up there.


I spent some part of the day inside because I was feeling really frustrated with this trim and having a hard time with life in general. Blerg.
We were close to finally attaching that last rake trim. It was kind of a long climb up there.


 I wish I could feel a little bit more joy reflecting on this being finished, but mostly I’m just irritated that it took so long!! Oh, how I long for a completed roof!
Just Nate making one million little attachments for the final roof piece, which will be the ridge cap.

Happy New Year, Tiny House!

We have been having some weather! Quite a setback for our poor tiny roof.
All rake trim, all day! 


Cleats and z-trims were already in place. That left cutting and folding and manhandling the rake trims.


 Almost there!
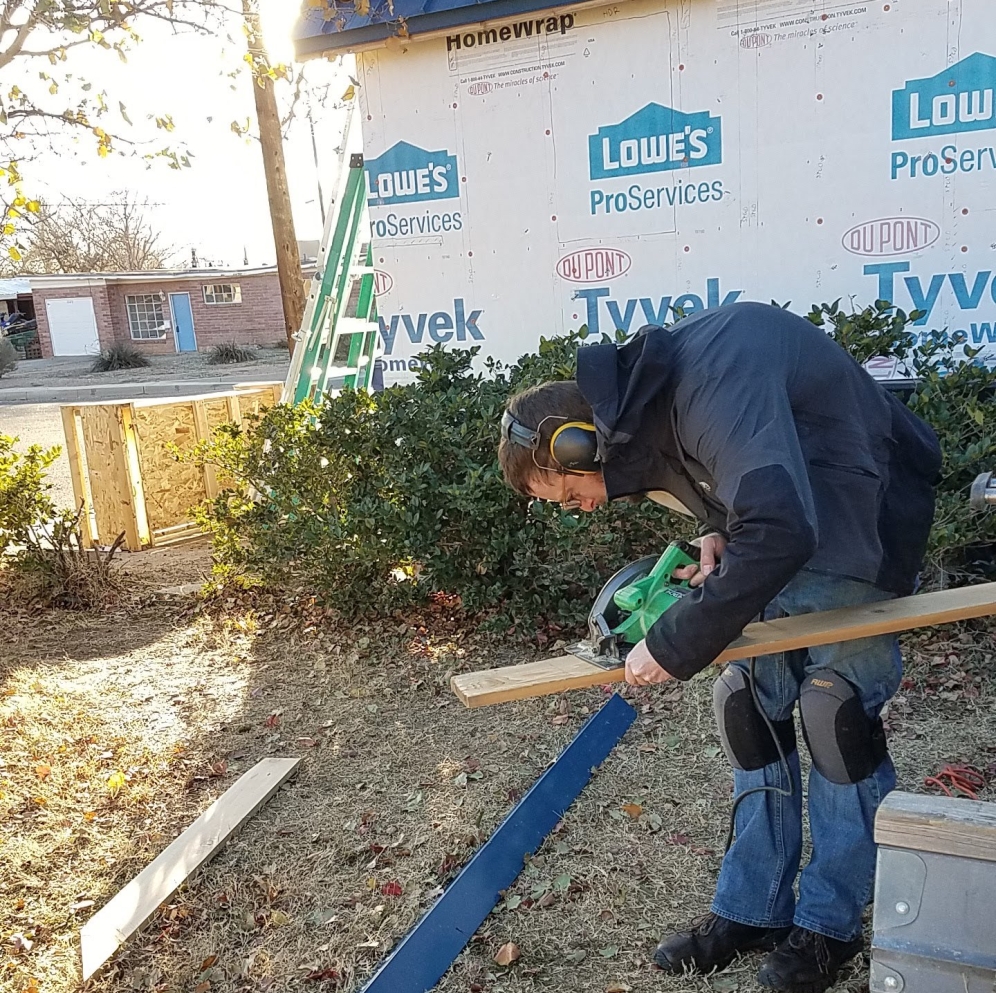
Time to finish up the fascia, now that all the panels and lower trim pieces are on. In the picture below, Nate was lining up a piece to mark for a cut. It was kind of nice to get the saw out again!
Here I was, applying glue and going for the “Most Awkward” photo award at the same time:

Without fasica:

Fascia screwed in tight and sealed up with the water barrier:

For some reason, this piece of wood had a bunch of dried glue that I had to scrape off. Sometimes you imagine the things you need to get done on a project, and then you spend a bunch of time doing something you really did not anticipate.

Nate’s saw skillz: l33t
 Well, this piece is going behind another piece, so it won’t show…

 Right one done, left one not. Not easy to photograph:
Inclement weather, so we started indoors. This is our favorite Canadian roofer, Dave Mackey.
  We have watched hours of his how-to videos from American Building Components. Yeah, I know it has “American” right in the title, but you listen to this guy talk for 3 seconds and you KNOW he’s Canadian. We were watching the video about how to do rake trim. We both kind of have a builder’s crush on him. That’s a thing, right? When you’re learning to build, and you see someone who makes it look so easy… so you watch every video they make and try to learn everything you can from them. That’s what I call a builder’s crush.
We went outside later, to discover that the trim pieces poor Nate had picked up were wrong AGAIN. GAH!  Wrong size: about 1/2 too short. Wrong color, AGAIN. The bottom piece is what we want.

We felt pretty cursed. Why we can’t get the right pieces? I have no idea. We just can’t!
After some cursing, maybe a few tears, and some serious pouting on my part, we laid out all the pieces we had and decided to just use the short, wrong colored pieces for the shallow angle roof and use the correct stuff for the steep roof. WRONG PIECES BE DAMNED!

Step one, according to Dave Mackey, is to place the trim with its cleat and mark on the fascia where the cleat needs to go. Cleat gets attached to the fascia, and the trim piece fits onto the cleat really tightly. Above, Nate has the cleat in place. Next, you place and attach the z-trim, attached on top of the roof, which the trim fits onto really tight and which has the rivets. So the top of the rake trim fits on the z-trim on the top of the roof, and the bottom of the rake trim fits on the cleat on the fascia. Next, cut and fold the trim, which we kind of had to make up (shown below). Next, put on all the sealant and putty tape to seal everything up and put it all together. This step involves what Nate calls MAN STRENGTH. Finally, rivet the top of the trim to the z-trim attached to the top of the roof. Easy, right? In practice, add in 3 or 4 or 5 more iterations where you place the stuff and mark it, cut or fold it, test fit, and repeat.

This is why we start on the B-side, now. So we can do the 2nd one better on the A-side. Marking for A-side:
 The B side looks alright from the front
I don’t have quite as much patience for the finesse cutting/folding stuff.

I can do the cleat & z-trim attachment that doesn’t require much finesse or patience, though…
Here’s an extreme angle view of what I was doing.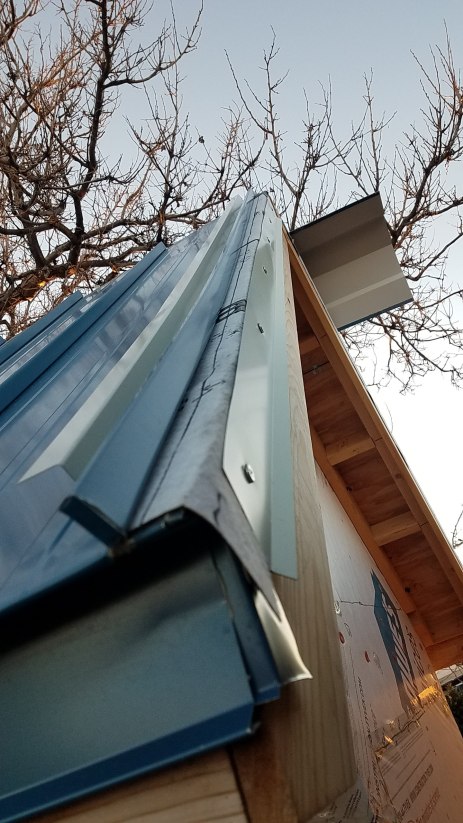 Here’s Nate with his almost finished piece
 Can you tell it’s a different color than the main part of the roof? Just say “no,” so I feel better about it.
A roofer’s as lucky, as lucky can be!
More trim!

Intermediate pieces on:

A roadrunner visitor!
 He spent some time walking around the yard and then checked out our progress. It seemed that he approved.

Me, taking pictures of everything. Me, riveting.


Here’s the progression of riveting:

Step 1: Drill a hole. Step 2: Put the rivet in the hole – the rivet includes a long metal spike and a flat disk above, and a thicker sort of ball thingy below. You can see the spike, flat disk, and ball thingy in the picture below:
Step 3: Rivet! The long metal spike gets pulled up & discarded; the ball below gets squashed. Post riveting in the picture below:


All done!

 Back to the B side…

So much tacky tape. So much sealant!


What work have we got left?
Well, let me see… Oh yes, lovely: trim. And look! MORE trim.
I hear the above quote in Frodo and Samwise Gamgee’s voices
Got the B-side long piece of trim actually on:

And then we finished up the end wall trim at the very back of the house!

 Next up is the rake trim: the trim that will cover the shiny stuff where Nate is working in the picture above. We just need to get the correct pieces first…
Before I get to day 100, here I am with our new trim replacement pieces
… that didn’t come in when they were supposed to. Bummer.
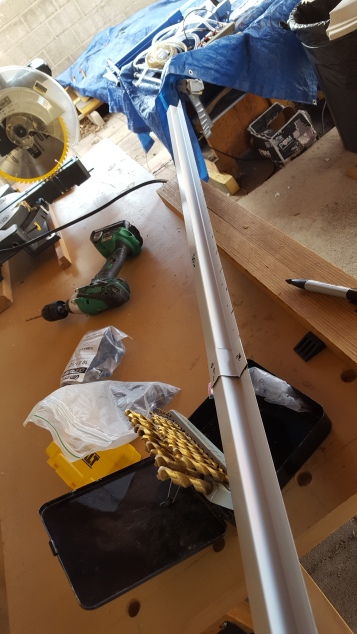
And here is Nate figuring out how to do the ridge cap join using sticky notes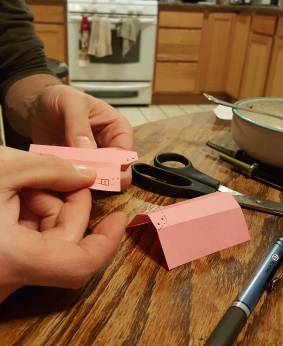
OMG THE ONE HUNDREDTH DAY OF CONSTRUCTION!  Alas, we were working on some fussy trim that goes between the outrigger, pictured above, and the wall above the outrigger. To attach the fussy trim, we needed what seemed like a million intermediate pieces. Here is a picture of Nate with the first intermediate piece (a small horizontal line of z-trim at the right edge of the dormer wall):

 … and above he was screwing in the second one. They’re a pain to put in because you have to screw through the piece and the roof, and there’s tacky tape in between, which gets all wound up in the screw. Also you can’t get a good angle on the screw driver because it’s so high up on the roof and so close to the wall because of how the ladder lies.

I think if we had known it was the 100th day, we might have done something more climatic. Oh well!
 We were still working on the finicky intermediate pieces.

Finally, we got to put the stupid piece in place. But first, MORE SEALANT!
And more tacky tape, my favorite thing.

Here’s Nate with the actual trim piece covering up the intermediate pieces. It’s pretty tight! We still need to rivet it down, though. It was looking pretty good by the end of the day, though!

Nate spent some time in the evenings during the previous week to put in all the little panels on the outrigger.

We were looking at the getting the last big panel on the end. But really, when you’re working on the roof, this is your usual view:

We had some more flashing (and sealant) to contend with…

Alright, last panel!

Then we turned to the other side of the house, which we are calling the B side. We had to start the process all over with the panels.
We max out the ladder to reach the top screw…


Also those screws require a LOT of force to drive in!
Not bad for a day’s work!

It was much colder, and it was raining lightly on and off. I think our neighbors were pitying us. We had a bunch of people stop and yell encouragement from their cars.
This is how we bend the flashing: teamwork! I call my part of the process being a “dynamic counterweight.” (I’m sitting on it, you guys.)

Good thing we have metal clamps!


Sealant and nails…


Nate was also working on the flashing. The corners are tricky! It was a bit tricky to nail through so many layers of metal.

I was singing “Roofing in the rain! Just roofing in the rain! What a glorious feeling! I’m happy again!” when the following picture was taken. I don’t think Nate really agreed.

Roofing sealant features prominently in our roof installation. Here I was modeling the brand new rain jacket I bought and then immediately ruined with grey roofing sealant. I SWEAR: it’s not bird poop!
Working on the panels under the eaves of the upper roof sucks. It is awkward to reach up there, and it’s cramped. I think I’m glad we waited to put the wood fascia in, because we have a bit more room to work without it. But, it still sucks up there.
Resizing the panels creates these long corkscrews of metal trimmings. AKA, glorious moustaches:


But you guys! This is the LAST PANEL! OF THE WHOLE ROOF!!


 Glorious! Can you hear the angels singing?
Nate went to the metal roof store to get new pieces, but they were still wrong pieces. Hawaiian blue is not Ocean blue. Oof.


I know it’s hard to see, but you could really tell the difference when you hold the trim against the roof panel. Well, we decided to keep working on the roofing panels.


We made some good progress, although it was pretty rough reaching up so high!


We spent a bunch of time just gazing at it! Isn’t it pretty??
Oof. It was cold. Before we could work more on the roof panels, we needed to flash the corner between the wall and the roof. Flashing in this case is folded aluminum. You always need to start at the bottom of the house and put those layers down first, so we had to put a long horizontal piece under the dormer wall before we could do the vertical piece between the wall and the roof where the next panel would go.


Adults using a protractor?! Who knew!! Above, we were bending, cutting, and folding it to match the cardboard template.


Sealing and then installing the flashing with roofing nails.

Dream flashing! We were pretty proud of this!


Once we got the flashing on, we had to custom cut and bend a crazy shaped roof panel to fit against the flashing and the outrigger. It may not look that crazy, but it was a lot of work to make it that shape.


 The concealed fastener panels are a bit tricky. The funny shaped panel had the edge cut off so it could fit against the wall. Cutting the edge means losing the nailing fin. So to hold it down, we put the first part of the next layer of trim down: a z-trim piece. You use this yucky tacky tape in between layers of roofing pieces, then you screw it in.

This was all much more difficult than it seemed like it should have been, and it will be covered by the trim that goes between the wall and the panel (once we get the right color). Oof. You can see the z-trim from the previous picture as a white line near the dormer wall. It took us all day to get the silver flashing, the funny shaped panel, and finally the z-trim installed. Verdict: trim is a LOT of work. OOF.
